Coda Tutorial for Planning & OKRs
Pages
 1.3 Creating custom views of your OKRs
Use one of Coda's most powerful features to give everyone their own view of the same shared data.
One of the most powerful things about Coda is how we can create custom views of your data. With Coda tables, you can create as many views of the table as you need for your team - editing a cell in a view will change the value of the underlying table and all other views.
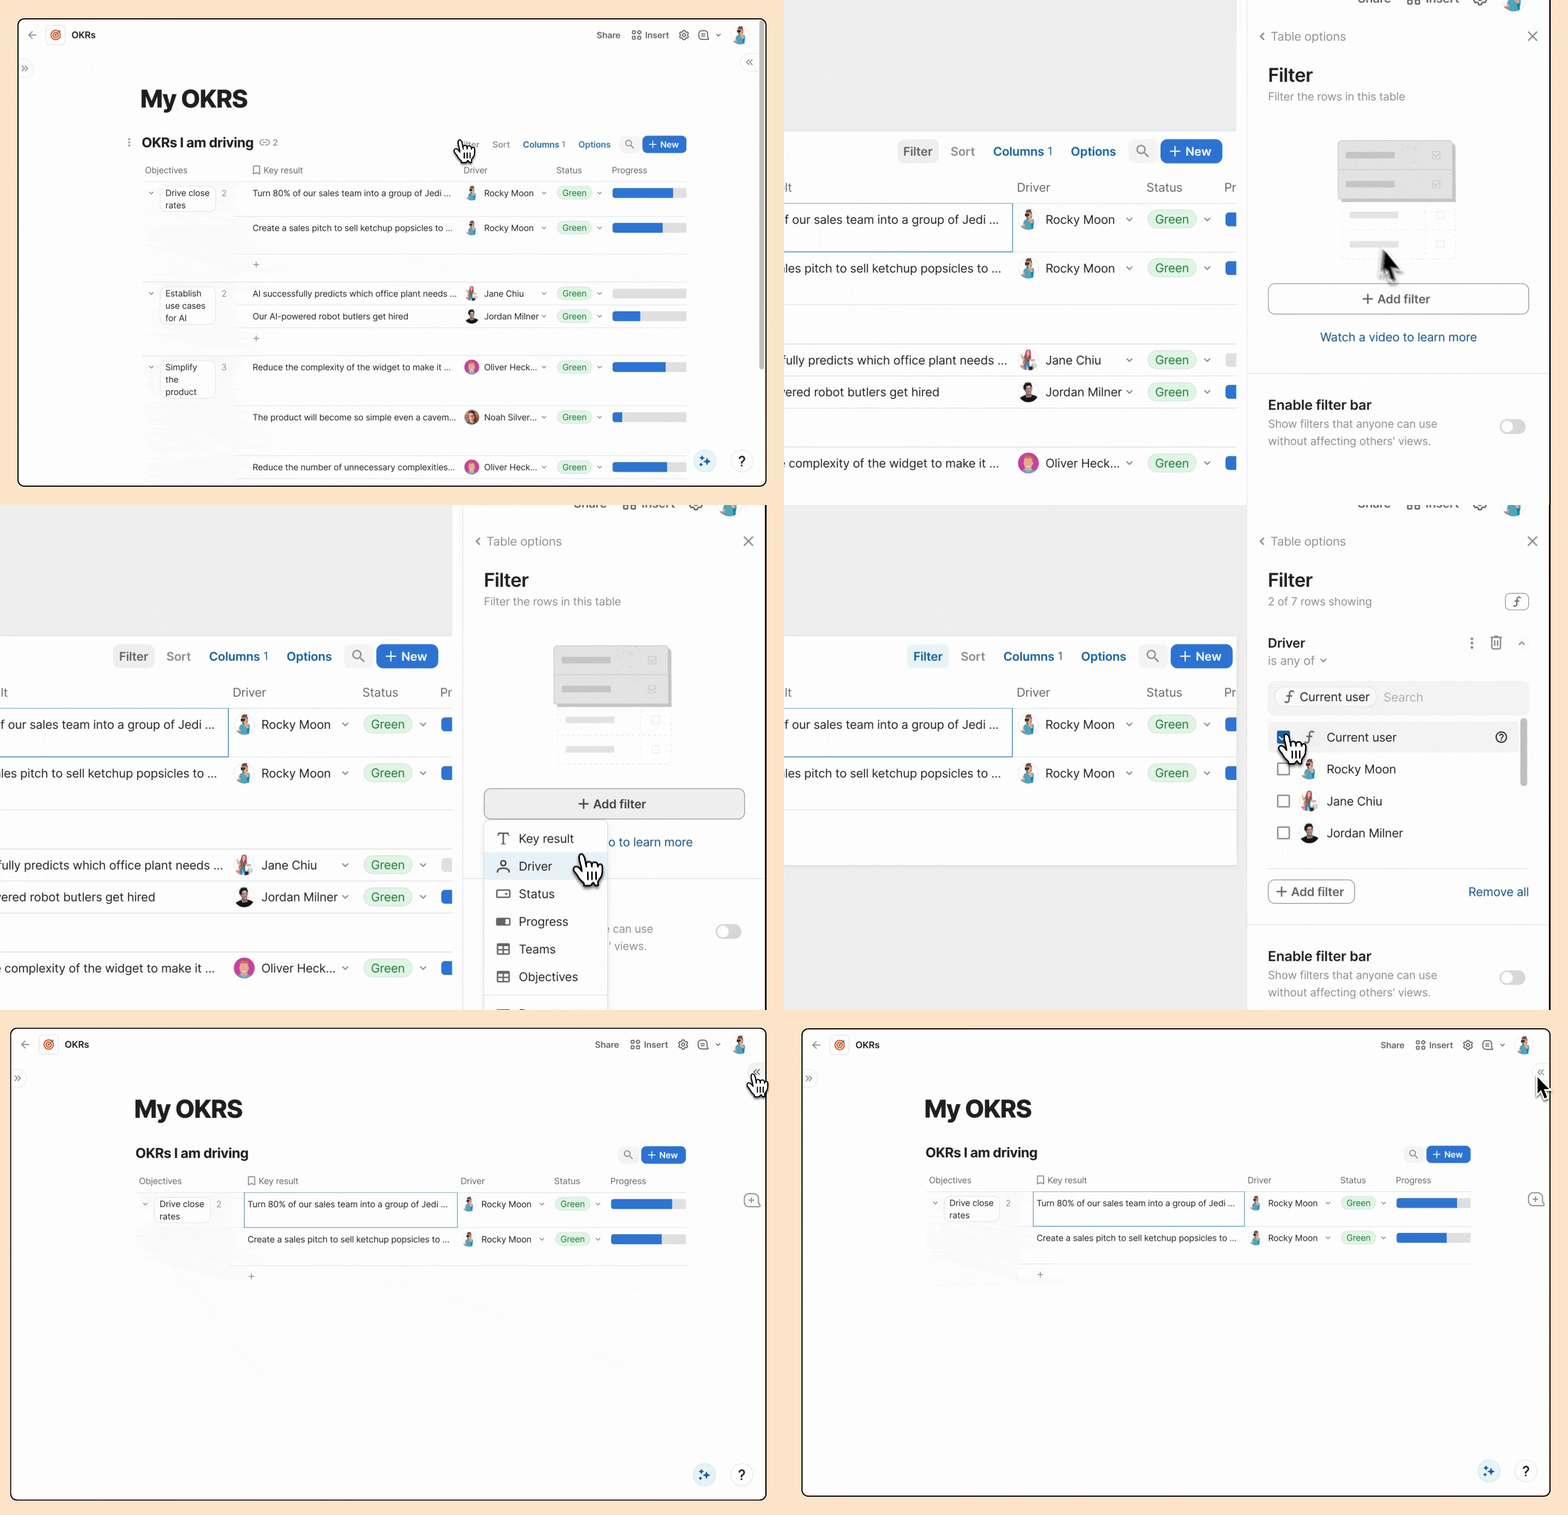
One of my favorite way to use Coda’s views is with the Current user filter to create a view that is specifically tailored to the currently logged in user. We will use that to build a My OKRs page that shows the OKRs of the person looking at the page. We will also build a custom page to look at the OKRs of one specific team.
⭐ What you’ll get
💼 What you’ll use
1. Create a view of your personal key results.
Let’s create a My OKRs page that shows all the OKRs that the user looking at the document is driving. This page will look different to every person looking at it
Tip: You can hide table titles by clicking the 3 dot menu that shows up when you hover your mouse over the table title, select Customize header and turn off Table title.


Tip: Because the table is filtered for the current user, you only need one page and each Driver will see their own key results.
2. Create a view of key results for your teams.
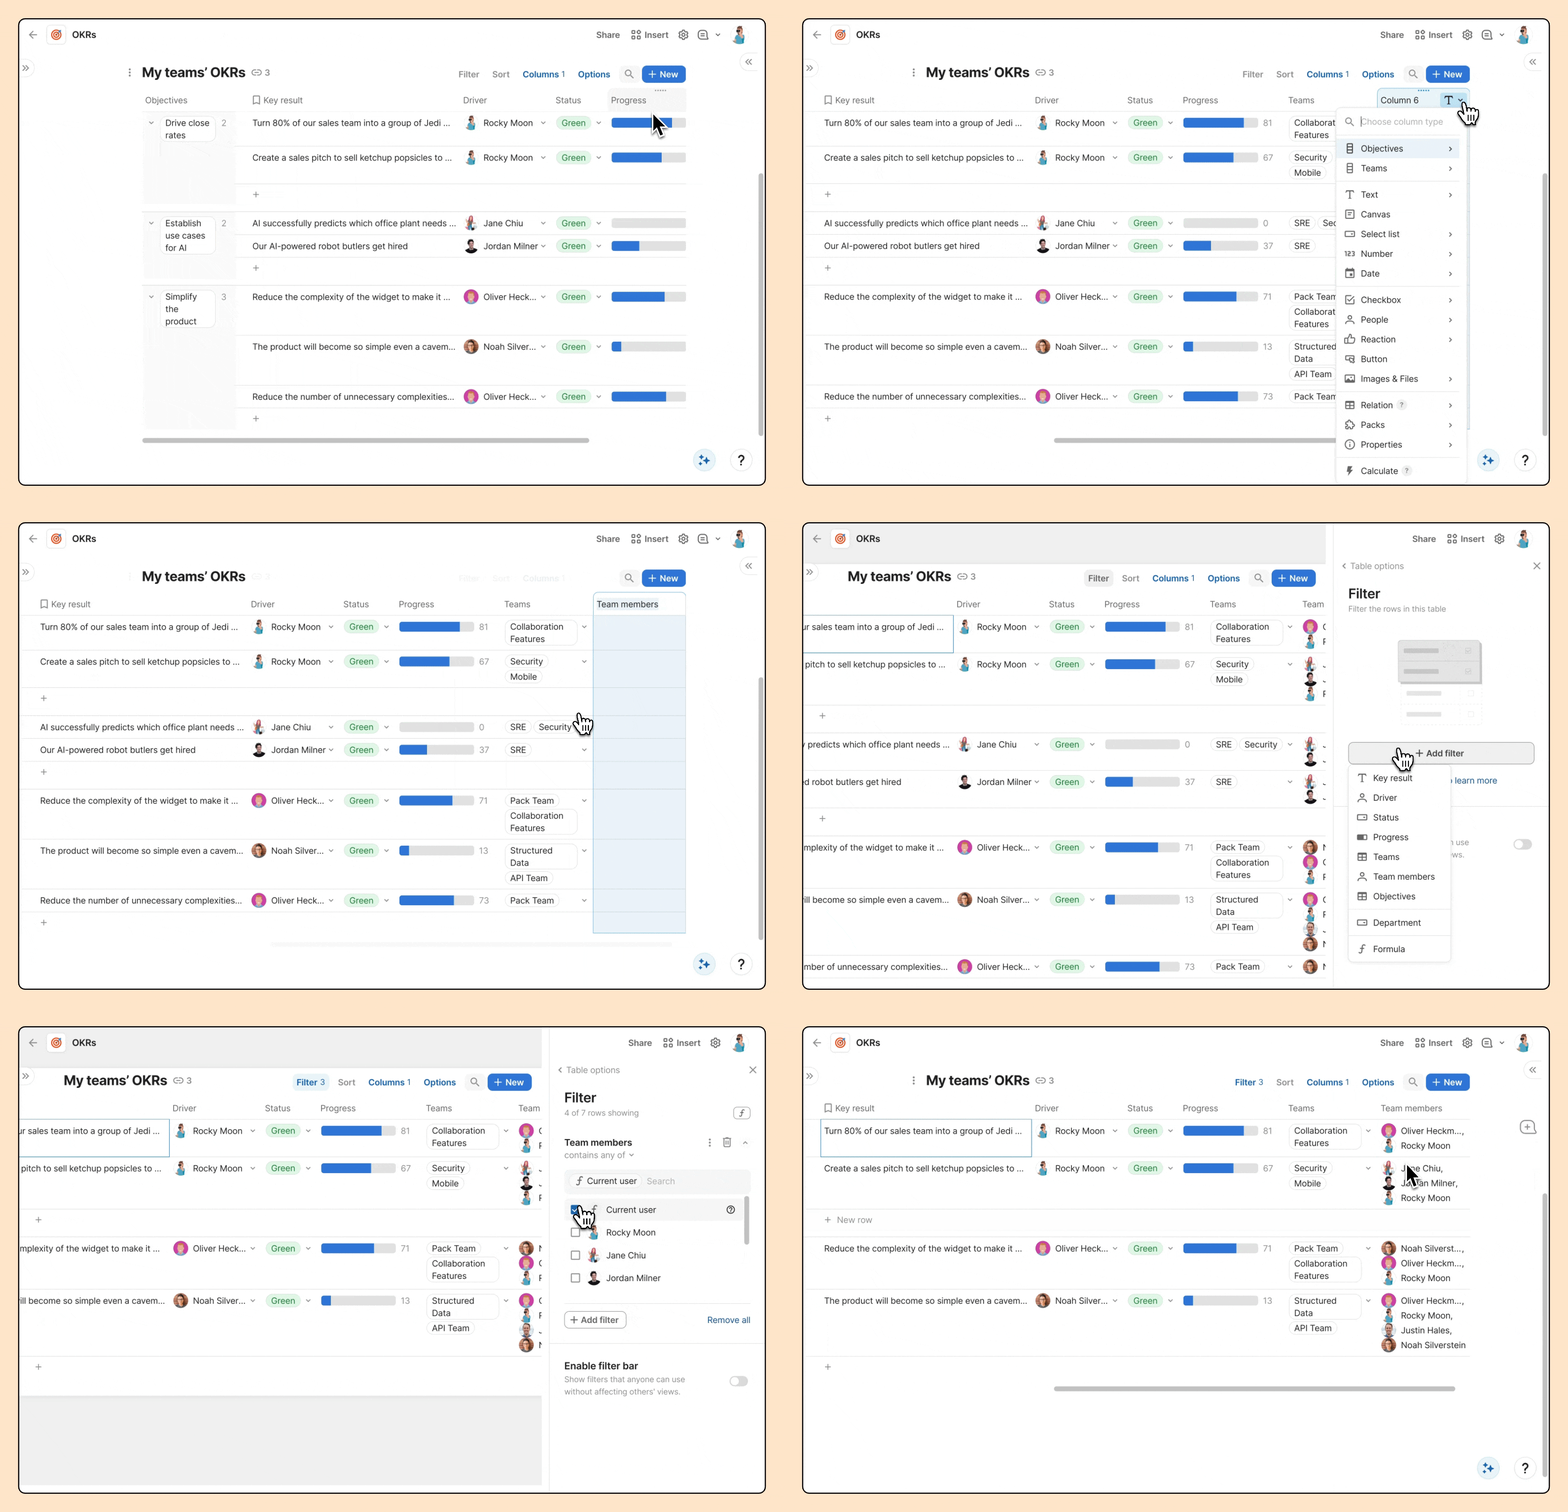
In the above view, you can see all the OKRs you are the driver for. But your help might also be needed for other OKRs your team has signed up for. So, let’s add a view of all your team’s OKRs.
Option 1 - Add a column to filter.
Option 2 - Filter with a formula.


Tip: You might want to add a filter bar to your My teams’ key results table. You can enable that in the table’s Filter menu.
Now what?
Want to see how your document should look when completing the above steps, check out the checkpoint doc for Chapter 1 in the
With the basic structure of your OKR doc completed, it’s time to take your planning game up a notch. Head over to to keep moving.
Want to print your doc?
This is not the way.
This is not the way.

Try clicking the ⋯ next to your doc name or using a keyboard shortcut (
CtrlP
) instead.